Start with the label, not the iron
Shine and scorch marks usually come from too much heat, too much pressure, or leaving the iron in one spot. Before you begin, read the garment’s care label. If it says not to iron, do not treat a low setting as permission to try. If the label allows ironing, start at or below its recommended temperature. When a garment contains several fibres, use the setting suited to its most heat-sensitive component.
Sort your ironing from lower to higher heat so the iron has time to warm up between garments. Cooling down takes longer, which makes it easy to use a hot soleplate on a delicate shirt by mistake. If you are unsure how a fabric will react, test a concealed area first, such as the inside of a hem. A clean ironing board cover matters too: dirt or old starch on the cover can transfer to clothing.
Set up a barrier against shine
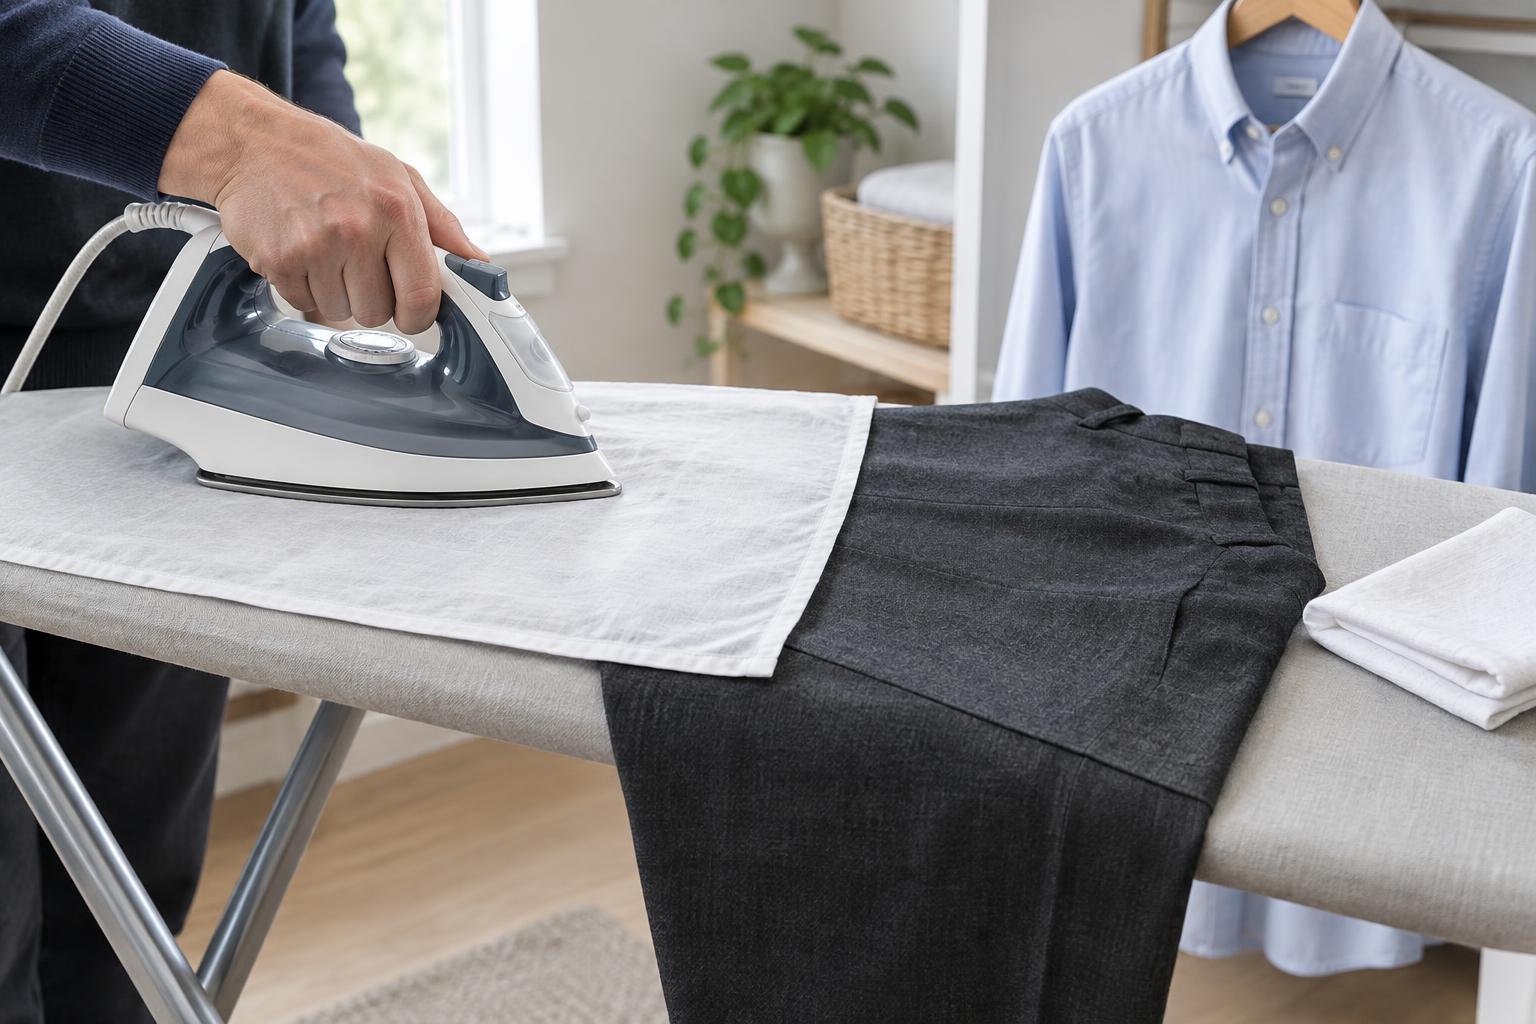
Dark trousers, wool blends and synthetic fabrics can develop glossy patches when the iron presses their surface fibres flat. Turn suitable garments inside out where practical, and place a clean, lightweight cotton pressing cloth between the iron and the fabric when working on the outside. The cloth should be smooth and free of dye that might transfer. Use gentle pressure, lift and reposition the iron rather than grinding it across seams or pockets, and keep it moving when ironing a broad area.
Steam can help relax wrinkles without relying on high heat, but use it only if the care label permits it. Too much moisture can leave marks on some fabrics, so test first and let the material dry before deciding it needs another pass. Make sure the iron’s soleplate is clean and its steam function is working normally; a sputtering iron can stain an otherwise clean garment. Follow the iron maker’s guidance on water and cleaning.
Iron a shirt in a useful order
A slightly damp, washable cotton shirt is often easier to smooth than one that has dried into deep wrinkles. Begin with the small areas: iron the underside and then the outer side of the collar, working from the points toward the centre to avoid pushing wrinkles into the tips. Open each cuff and press it flat, taking care around buttons. Never run the iron directly over buttons, which can be damaged or leave impressions in the fabric.
Next, smooth each sleeve along the board and iron from the shoulder toward the cuff. If you do not want a sharp line down the sleeve, keep the folded edge just off the board while you iron the main surface, then rotate the sleeve to finish it. Work through the back and front panels in sections, moving the shirt around the narrow end of the board. Iron around, rather than over, buttons and raised stitching. Hang the shirt promptly and leave it unbuttoned until any steam has dispersed.
Press trousers without flattening the details
Empty the pockets and close the zip before laying trousers on the board. Start with the waistband and pocket area, using a pressing cloth and light pressure so pocket outlines do not show through on the front. For flat-front trousers, smooth the fabric around the upper legs without forcing a crease where the garment does not have one. Tailored trousers with an existing centre crease are different: align the inner and outer leg seams so the original crease falls naturally into place.
Press one leg at a time in sections, placing the cloth over the fabric and lifting the iron between presses. Check the crease alignment before setting it with steam; a misplaced line can be difficult to remove. Avoid pressing hard over hems, side seams and pocket edges, which can create shiny ridges. If the cloth becomes damp, let the trousers dry fully before wearing or storing them.
Know when to stop
If a wrinkle resists a safe temperature, do not keep increasing the heat. Try a little permitted steam, adjust how the fabric lies on the board, or hang the garment and return to it later. For delicate finishes, heavily structured trousers or fabrics you cannot identify, a garment steamer or professional cleaner may be a safer choice than direct ironing.
If you notice a new glossy patch, stop before repeated pressing makes it more visible. A little steam may help some flattened fibres recover, but it will not reliably reverse heat damage. Brown scorch marks and melted fibres can be permanent. The best result comes from patient preparation: a suitable setting, a clean pressing cloth and enough time to let the garment cool before judging the finish.